Showing posts with label TH tags 2011. Show all posts

Friday, December 23, 2011

Tim tag #12

YAY!  I have them all finished!

Here is the link to Tim's tag #12.  And here is my version. 

I again needed to improvise:
I have none of Tim's tissue paper, so I used a jumbo wheel and stamped that on some plain white tissue paper.
Next -- no glue & seal; I substituted a glue stick. 
I don't have rock candy distress stickles; I substituted rock candy crackle paint.  I put on a very thin layer and added some glitter, so there is lot of shimmer. 
I don't have the artful dwellings die; I just cut one freehand. 
No blue paint dabber; I pulled out some old acrylic paint.
I tried the tissue paper flower; a total failure - it kept tearing; I substituted a flower punched from phone book pages and colored with glimmer mist.  (You can see bits of yellow in there from the phone book.)
No fractured dolls (although I refuse to put a dead doll with missing body parts on anything artsy!); why not butterflies?  That's always a good choice.
No vintage lace die; at that point, I decided to crochet an edging in a blue that matched.  That took about 20 minutes, and I really love how it add softness to the tag. 

I added some of the same crochet cotton at the top of the tag.  And with that I decided to call it quits. 

I really LOVE this tag.  It's blue.  There are butterflies.  There's a flower.  And there's lace.  What's not to love!?

Looking back on all my tags, I realized that I made three that are blue with butterflies.  Imagine that!

Thank you so much for joining me on my journey through Tim's 12 tags.  This is the first year that I've played along and I am so happy that I made it all the way through. 

Tim tag #11

Hello again.  One tag closer to being done!  Ha!  Actually, I AM done!  I just have the last two to post.  But one at a time. 

Here's the link to Tim's tag #11.  And here's my version. 

Oh, and more improvising...  I don't have a melting pot.  So I die cut some holly leaves & berries from shrink plastic and put them in the oven to shrink.  Then I attached those tiny pieces to strips of post-it note in order to hold them in place while heat embossing.  I pressed the leaves into versamark ink and then in clear UTEE, heated to melt the UTEE, and then, while still hot, dipped them in the UTEE again and heated.  When using UTEE, I almost always use at least two or three coats, so that I get a nice, smooth surface.  Once the leaves were cool, I colored them with alcohol inks. 

I don't have a single Santa Claus stamp, so I decided to use a Christmas cardinal (SU) and just colored the bird red and the leaves green.  It's a little hard to tell, but I used a sponge dauber to add yellow to the beak. 

I love how the background turned out.  At first I thought I flicked too much water on it, but it was OK once it was dry. 

After attaching all the pieces, I realized that since my image is so much smaller than the one Tim used, my tag looked a little bare.  So I added a border of faux stitching. 

Thanks so much for stopping by.  I'll have my final tag posted shortly. 

Tim tag #10

Hi my friends.  I think I might just get them all done.  I'm one more tag closer to getting finished.  This is my second one today, but by the time I finish typing my post, it will probably be a new date, since it's almost midnight. 

Here's the link to Tim's tag #10.  And here is my version. 

More improvising was required on this tag.  I had actually started the first step a couple of days ago - packing tape transfer - but my first one (actually two) have disappeared.  I think static is probably the reason.  They grabbed onto something and are hiding.  But that's OK.  I actually like this one way better.  I pulled out some old Christmas cards and found a picture that was small enough to use. 

Then came time to do some improvising.  Although I'm sure all the paper was gone from the tape, the metal foil tape didn't show through at all, so it made no sense to even use it, so I didn't.  I also don't have any facets, so instead, I used a piece of plastic packaging on the front of the picture and on the back, I built up a few layers of card stock to give it some stability.  I used my cropadile to punch holes in it for the brads. 

My music background stamp is from Judikins and the greenery is from Cornish Heritage Farms.  After I stamped the green, I heat set it before I put the embossing powder one -- oops!  So I pulled out my versamarker and went over all the stems and leaves and then embossed it.  You can't even tell the difference. 

No banner die here, so I cut that freehand, and added some distress ink to make it blend with the rest of the tag.  I stamped the sentiment and cut it apart, because it was in three lines.  It was too long to fit the banner, so I just left out the word 'still'. 

Then I added some hand cut holly leaves and some punched berries, to which I have added some glossy accents.

I'm so glad you stopped by to visit.  I'm not sure I'll be posting again before Christmas, so I hope you have a wonderful time with your dearest friends and family.  We have two get togethers this weekend, one with my husband's family and one with mine.  Tomorrow I need to do some food preparation. 

Thursday, December 22, 2011

Tim tag #9

Hello my friends.  The house is a mess, there are dirty dishes in the sink, but... I have another tag done!

Here's the link to Tim's tag #9.  And here's my version.

The background is a Hero Arts stamp called pine flourish, stamped with pine needles distress ink and embossed and then colored over with barn door distress ink and embossed.  Over that I added vintage photo distress ink. 

Since I don't have the candlestick die, I made a street lamp using the sewing room die and the mini bird & cage die set.  I did something similar in this post.  I just trimmed off part of the dress form to make the post taller.  It's painted with pitch black and snow cap paint dabbers.  For the light in the lamp, I trimmed a piece of packaging plastic to fit and colored it with sunset orange and sunshine yellow alcohol inks and then backed that with white card stock.  The bow is part of a haul I made when a local craft store closed several years ago. 

The letters are from a retired Sizzix alphabet called block party.  I inked the black card stock with versamark and then with two coats of clear UTEE. 

Thanks so much for stopping by.  I guess I need to go wash the dishes now. 

Wednesday, December 21, 2011

Tim tag #8

Hello my friends.  I'm getting closer.  I was able to finish another tag today.  This is the first year that I've done them, so I feel great that I've gotten this far. 

Here's the link to Tim's tag #8.  And here's my version. 

Since I've already done a tag in a steampunk theme, I kept this one a quite a bit more mild.  The windmill and lady stamps are B&J Artstamps. I colored her with sponge daubers, q-tips and waterbrush and distress inks.  I also used a white gel pen on her eyes

I decided to use card stock instead of grungeboard for the gears, so the tag is much lighter in weight.  I used copper, silver, black and white paint dabbers on the gears.

Thanks for stopping by.  Just four more tags to go.  Do you think I can get them all done?

Tuesday, December 20, 2011

Tim tag #7 (faux kraft glassine)

Hello again, my friends.  I had the house to myself for a few hours today, so I got busy creating.  Another tag closer to getting them all done.  And more improvising.  There is just no way I can justify having every product in Tim's arsenal, so I figure what I don't have is an opportunity to get creative.  I have a large enough stash of my own, that I don't usually have any problem making substitutions. 

Here is the link to Tim's tag #7.  And here is my version. 


(Sorry, my photography stills are somewhat lacking, so there's some glare from the embossing.) 

I actually started working on this tag last week, but there were other things to do that just pushed it aside.  For starters, I didn't have any kraft glassine paper.  I knew there was a tutorial available that showed how to make faux glassine paper using tissue paper and Future floor finish.  Of course, the only tissue paper I have is white.  So I decided to get creative and see if I could make something at least resembling the kraft glassine.   I had a lightweight brown paper bag, as well as plenty of heavier brown grocery bags, so I decided to try both.  Following the tutorial, but without adding color, I coated a piece of each weight of bag on both sides with the Future floor finish and set them aside on plastic to dry. 

Once they were dry, I checked the results.  The brown grocery bag really showed no major difference in appearance, so I tossed that.  I think it was just too porous.  The thin brown bag, however, was exactly what I was hoping for... SUCCESS!  And it didn't matter that there were fold lines in the bag, since I was going to crumble it up anyway.  Now, I just need to figure out what stores use those bags so I can get more.  I'm pretty sure one of the local art supply stores is one source.  Must make a trip over there...

Since I wanted to see how the faux glassine paper would react to crumbling it up, I kinda reversed the steps, crumbling it first and then adding color with alcohol inks. 

I didn't have the holly leaves die, so I used tattered leaves mini.  I also don't own any of Tim's Christmas stamps, so I substituted one from SU. 

To add a splash of color, I attached some hand-crocheted red flowers with some old white buttons.  I'm really happy with the way this tag turned out. 

Thank you for stopping by.  I'd love to know what you think.  And be sure to check out the tutorial on the faux glassine.

Saturday, December 10, 2011

Tim tag #6

And here's my last one for tonight.  This one was so fun to make, but certainly had a mind of its own and went in a completely different direction than what I had anticipated. 

Here's the link to Tim's tag #6.  And here's my steampunk version. 

I didn't have the sheets of sticky back foil, so I started by using metallic tape from the hardware store.  Since it's only about 2" wide, I had to piece it on my tag. 

Since I really didn't care for the bright colors Tim used on his tag, I decided to limit my colors.  I pulled out my Cuttlebug clockwords embossing folder and knew right away that I wanted to use black.  I suppose that there is something different on the coating of the tape, but the black paint didn't want to stick -- just kept beading up.  So I wiped it all off and pulled out pitch black alcohol ink and used that instead.  I covered the whole tag with the black ink, let it dry and then sanded over all the raised areas.  Awesome!  From that point, it was steampunk all the way. 

I die cut umbrella man in black and white & trimmed off the umbrella.  I wanted him to be holding up a wreath.  Well, guess what.  That was just not happening.  He ended up carrying some big gears over his shoulder instead.  I die cut the gears and clock from brushed silver and copper card stock and then dirtied them up with a black paint dabber. 

Although I really love the look of steampunk, I usually struggle with creating anything like that, but this one just seemed to evolve all by itself.  I'm really happy with the end result. 

Thanks for visiting.  I'm hoping to get some more creative time on Saturday, but the afternoon is my lace guild Christmas party, so I'm not so sure that I will. 

Friday, December 9, 2011

Tim tag #5

Hello again.  I told you I'd gotten several tags done today.  I still have one more after this one.  That makes me closer, but still not caught up. 

Here's the link to Tim's tag #5.  And here's my version. 

I'd read that a lot of people had trouble with this technique, so I was anticipating that I probably would as well.  Imagine my surprise that it worked the first time.  I was careful to read the instructions carefully and had them in front of me to refer to step by step. 

I again chose to not do Christmas on this one.  I used a Hero Arts floral stamp and the butterfly is also Hero Arts.  I had the butterfly already finished.  It's painted with twinkling h2o's.  I just darkened the black lines with a marker.  I guess I used the wrong kind of adhesive, because it shows through the plastic, but other than that, I really love this tag. 

Thanks for stopping by. 

Tim tag #4

Well, here I am again with the next segment in the tags.  This one took a long time to make, mostly waiting for things to dry. 

Here's the link to Tim's tag #4.  And here's my version. 

Again, I did a lot of improvising.  I decided to do something other than Christmas on this one.  I used the mini baroque die and then the butterflies movers & shapers.  The recycled plastic packaging is cut with my new vintage doily on the edge die (love this die).  I used the snow cap paint dabber to make it mostly white, so it would show up against the background. 

I really love how this one turned out. 

Thanks for stopping by. 

Tim tag #3

Hello, my friends.  Today was mostly a play day for me, so I got a few more tags done as I'm following along with Tim Holtz as he does this year's 12 tags of Christmas.

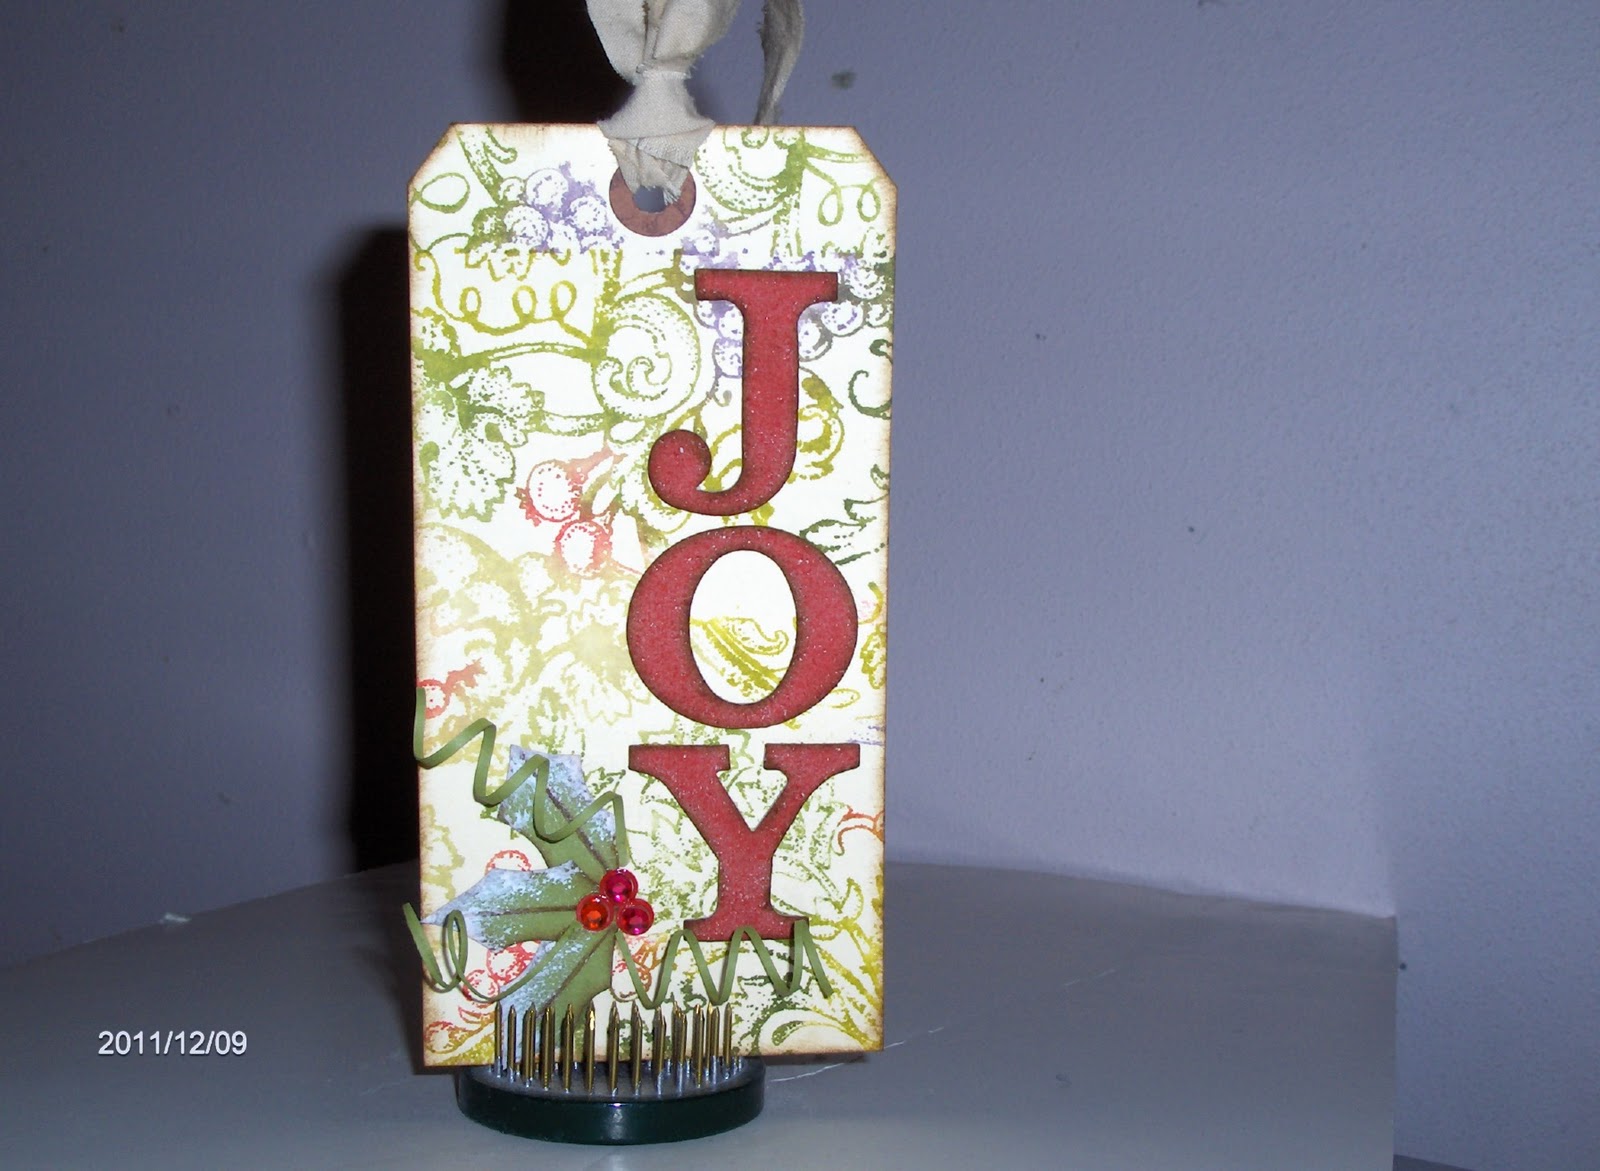
Here's a link to Tim's tag #3.  And here's my version, which I actually finished yesterday.

I did a lot of improvising on this one.  I didn't have any of the cut 'n dry felt, so I just colored my stamp with distress stains and stamped.  And after that, I pretty much went my own route.  The letters are grungeboard left over from the die I used on tag #1.  I colored them with barn door distress stain and inked the edges with vintage photo distress ink.

I cut the holly leaves free hand, added some vintage photo ink and some snow cap paint dabber.  The little curly pieces are very narrow strips of card stock, wrapped around a dowel to curl.  The red rhinestones are from my stash.

Oh, boy... frustration with learning how to use Picasa.  I think I may have it... hoping.

Thanks for stopping by.  I'll be back with another tag post.

Tuesday, December 6, 2011

Tim tag #2

Hello again.  Still struggling with the photo software.  I had to ask my daughter for help, but she uses photoshop, so she wasn't real sure either, but we may have figured out at least part of it. 

Anyway, on to my tag.  Here's a link to Tim's tag #2.  And here's my version. 


I didn't have any of the kraft resist paper, so I had to use other methods to come up with something similar.  I stamped on kraft card stock in black, then stamped the sentiment in versamark and clear embossed it, then colored over the tag with picket fence distress stain, and wiped off the embossed area. 


I have a gold paint dabber, but it was hiding and so I substituted some gold perfect pearls and spritzed over that with pearl mist. 


My little angel is a really old Sizzix die (one of those red ones).  I made the halo by braiding some gold ribbon, hand stitching two braided strands together and attaching with gold brads.  The beads are all from my stash. 

Thanks for stopping to visit.  Hopefully, tomorrow I can get caught up a bit. 

Tim tag #1

Hello my friends.  I think I've sorta figured out how to work with Picasa, but not totally.  I still haven't figured out how to file and label my pictures in special folders, etc.  But hopefully, I can find them to post here on my blog. 

This is the first year that I've played along with Tim Holtz's 12 tags of Christmas.  Of course, I'm already behind.  This is day six and I have the first two finished.  I'm going to post them separately, since I'll be linking my post to some other places online and it's just easier that way. 

Here's the link to Tim's tag with all the instructions.  And here's my version. 


I didn't have the coordinations paper, so I painted a piece of kraft card stock with pool paint dabber.  After embossing in the wood grain embossing folder and heat embossing with white, I sanded it and think it gives the same look as the coordinations paper. 

I don't have the noel die, but I have the phrase 'peace & joy', so that made a good substitute. 

Another substitute -- I used a 3-D flower die by Sizzix instead of the pine cone.  It's basically the same thing, but the shape of the petals is slightly different.  It's definitely not a favorite die, but I think they look like little pine cones, which is what I was striving for.  The little branches are punched with a Martha Stewart punch and the poinsettia leaves are cut freehand.   I love the addition of the snow cap paint dabber and stickles. 

The music banner was cut freehand from some music printed off the computer.  All the fibers and beads are from my stash. 

Thanks so much for stopping by.