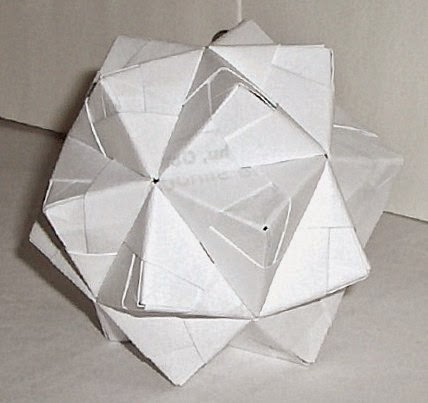
Hi friends. I just had to share a couple more sonobe balls. I'm not really calling these ornaments, because they are just too big for the tree.
When I first started making these, I was curious as to how well it would work using brown paper bags, not the flimsy flat ones, but the heavy ones from the grocery store.
I made two different sizes, two with 4" squares and one with 6" squares. It is definitely easier to put together the larger sizes, but I did find out that because this paper isn't as smooth, that was actually an obstacle when putting the pieces together. I think it would have been close to impossible to use this paper on a smaller ball.
The gold one is painted with gold Lumiere paint. And for the one in the front in this next picture, I stamped each square with a burlap background stamp from Cornish Heritage Farms in coffee archival ink. After it was all put together, I coated it with matte Mod Podge. I love how that one turned out.
And just for comparison, here is the biggest one along side one of the ornaments. I think I'm going to paint the large one, but I haven't decided on a color yet.
You can really see the detail of how the pieces are tucked into each other.
Thanks so much for stopping by.
Showing posts with label origami. Show all posts
Monday, December 8, 2014
Sunday, December 7, 2014
experiment
Hi friends. If you've read my last couple of posts, you know that I've been making sonobe ornaments. All of them have been made using recycled paper - some that has been printed on one side and discarded for some reason or other,
and some that was (glossy) magazine or catalog pages.
I have discovered that the glossy paper isn't very receptive to some of my paint, so I either must use the colors that will cover the print, or first coat the paper with gesso. Both are great solutions, but the gesso is just an extra step, and drying time prolongs the process. The computer printer paper works much better for the lighter colors of paint.
The problem -- I made a lot (and I mean a LOT - well over 100) of the ornaments in glossy before I discovered that little problem. This is a grocery bag about half full. These are just the unfinished ones. I have many on my tree and have given away quite a few as well.
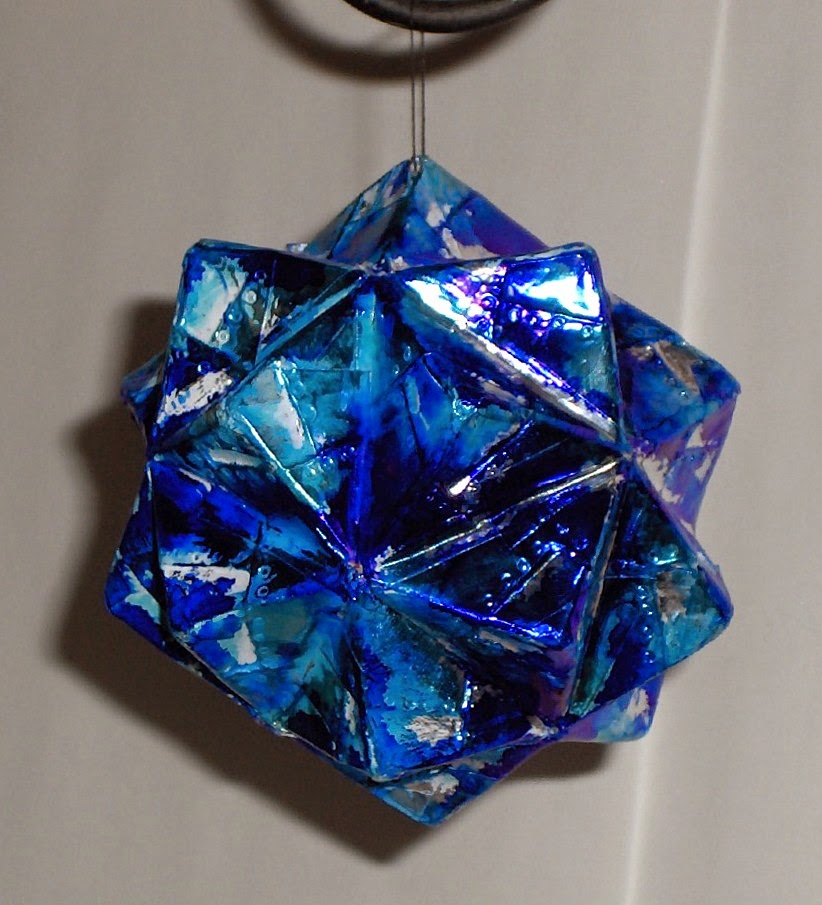
As long as I had a good supply to work with, I decided to try a technique called faux metal figures. It requires that you completely cover your piece with foil adhesive tape. Needless to say, this took a long time because of all the pyramids and valleys. Then you use the point of a pen, stylus, mechanical pencil, etc. to make 'rivets'. Sadly, these barely show in the finished piece.
When I came to this point, my ornament was very shiny and bright. I wanted to tone it down a bit, so I tried white acrylic paint. Because the tape doesn't absorb any liquid, I had to wait a long time for the paint to dry. By that time, I knew I didn't like the paint on it. I attempted to remove the paint, but it was impossible to get it out of the crevices. Frustrated, I decided to cover it as much as possible, so I used polished stone technique with alcohol inks. I left much of the tape uncolored.
Although not entirely happy with the end result, at least I was able to salvage it after all the work of applying the tape.
Thanks so much for stopping by.
and some that was (glossy) magazine or catalog pages.
I have discovered that the glossy paper isn't very receptive to some of my paint, so I either must use the colors that will cover the print, or first coat the paper with gesso. Both are great solutions, but the gesso is just an extra step, and drying time prolongs the process. The computer printer paper works much better for the lighter colors of paint.
The problem -- I made a lot (and I mean a LOT - well over 100) of the ornaments in glossy before I discovered that little problem. This is a grocery bag about half full. These are just the unfinished ones. I have many on my tree and have given away quite a few as well.
As long as I had a good supply to work with, I decided to try a technique called faux metal figures. It requires that you completely cover your piece with foil adhesive tape. Needless to say, this took a long time because of all the pyramids and valleys. Then you use the point of a pen, stylus, mechanical pencil, etc. to make 'rivets'. Sadly, these barely show in the finished piece.
When I came to this point, my ornament was very shiny and bright. I wanted to tone it down a bit, so I tried white acrylic paint. Because the tape doesn't absorb any liquid, I had to wait a long time for the paint to dry. By that time, I knew I didn't like the paint on it. I attempted to remove the paint, but it was impossible to get it out of the crevices. Frustrated, I decided to cover it as much as possible, so I used polished stone technique with alcohol inks. I left much of the tape uncolored.
Although not entirely happy with the end result, at least I was able to salvage it after all the work of applying the tape.
Thanks so much for stopping by.
Friday, December 5, 2014
a little box
Hi friends. I can't believe that I didn't post even once the entire month of November! My bad! I've been busy making origami sonobe Christmas ornaments and Christmas cards. I don't even know how many sonobe ornaments I've made, because I've given many of them away. I know the number is well over 100. I made a lot of them with glossy pages from old mini catalogs from when I was a demonstrator for Stampin' Up!
I've been painting them with Lumiere paints, but some of the lighter colors don't cover over the print. I either have to use the colors that do cover, or start with an undercoat of gesso, which certainly adds to the time required to complete them. I did find that I can use paper that had been through my printer and had been discarded for some reason. I just need to fold all the printing to the inside, leaving the outside clean and white.
I wanted to send one of these ornaments to a friend, so I decided to make a pretty little box to hold it. I know this friend likes blue, so I'm giving her a blue ornament. The box is turquoise, navy and white.
I started with a 9" square of turquoise cardstock and scored at 3" and 6" in both directions using my Scor-Pal. I trimmed out the four corners, leaving 1/2" tabs for gluing the sides together. For the top, I used a 5-1/8" square and scored 1" from each side and trimmed the corners the same way as for the box bottom. Before I glued the sides, I used a die from Spellbinders labels sixteen to make a cutout in the cover. I attached some clear acetate inside the cover for a window.
To decorate the box, I cut navy cardstock about 1/4" smaller than the sides and topped that with white labels sixteen, which I embossed with textile embossing folder and sponged with turquoise ink.
On the sides of the cover, I added navy cardstock. On the top four corners, I added small photo corners punched from navy cardstock.
The box is 3"x3"x3" and the ornament fits just a bit loosely inside, so I'll add some tissue paper to make it look pretty and keep it from bouncing around.
I've hung quite a few of these on my tree. But I think it's more fun to see someone's face light up when you give them one. I surprised the mail lady with one yesterday.
I'm entering this box in the Scor-Pal blog challenge More than one Score #11 - Anything Goes. Thanks so much for stopping by.
I've been painting them with Lumiere paints, but some of the lighter colors don't cover over the print. I either have to use the colors that do cover, or start with an undercoat of gesso, which certainly adds to the time required to complete them. I did find that I can use paper that had been through my printer and had been discarded for some reason. I just need to fold all the printing to the inside, leaving the outside clean and white.
I wanted to send one of these ornaments to a friend, so I decided to make a pretty little box to hold it. I know this friend likes blue, so I'm giving her a blue ornament. The box is turquoise, navy and white.
I started with a 9" square of turquoise cardstock and scored at 3" and 6" in both directions using my Scor-Pal. I trimmed out the four corners, leaving 1/2" tabs for gluing the sides together. For the top, I used a 5-1/8" square and scored 1" from each side and trimmed the corners the same way as for the box bottom. Before I glued the sides, I used a die from Spellbinders labels sixteen to make a cutout in the cover. I attached some clear acetate inside the cover for a window.
To decorate the box, I cut navy cardstock about 1/4" smaller than the sides and topped that with white labels sixteen, which I embossed with textile embossing folder and sponged with turquoise ink.
On the sides of the cover, I added navy cardstock. On the top four corners, I added small photo corners punched from navy cardstock.
The box is 3"x3"x3" and the ornament fits just a bit loosely inside, so I'll add some tissue paper to make it look pretty and keep it from bouncing around.
I've hung quite a few of these on my tree. But I think it's more fun to see someone's face light up when you give them one. I surprised the mail lady with one yesterday.
I'm entering this box in the Scor-Pal blog challenge More than one Score #11 - Anything Goes. Thanks so much for stopping by.
Labels:
3-D items,
acrylic paint,
box,
christmas,
gesso,
gift ideas,
origami,
recycle/reuse,
scor-pal,
Spellbinders,
SU
Tuesday, December 20, 2011
origami leaf gift card holder
Hello my friends. Do you feel like December is just whooshing by like I do? I guess I feel like this whole year has zoomed past. I want to complete Tim's tags, but I'm not sure if I'll get them all done or not. I needed to take a break from creating in order to get other obligations finished. I have all my presents wrapped, with the exception of a couple that are baking related and the gift card shown below.
I thought I was done wrapping, and then I found a little note from DH attached to a gift card. I wanted to dress it up a bit, so I decided to use a fun origami leaf that I'd seen on a video. I made several before figuring out the correct size. It's not difficult, but does require some nimble fingers. If you attempt this, I recommend thin paper. I started with a 7"x10" piece of one-sided designer paper to get the size for the gift card.
I used several Spellbinders dies - classic scallop small rectangles, wonky rectangles, and lattice rectangles.
Thanks for stopping by. If I don't get a chance to post again this week, I want to wish you all a merry Christmas. I hope you get a chance to spend it with your favorite people. I appreciate each one of you who visit my blog.
I thought I was done wrapping, and then I found a little note from DH attached to a gift card. I wanted to dress it up a bit, so I decided to use a fun origami leaf that I'd seen on a video. I made several before figuring out the correct size. It's not difficult, but does require some nimble fingers. If you attempt this, I recommend thin paper. I started with a 7"x10" piece of one-sided designer paper to get the size for the gift card.
I used several Spellbinders dies - classic scallop small rectangles, wonky rectangles, and lattice rectangles.
Thanks for stopping by. If I don't get a chance to post again this week, I want to wish you all a merry Christmas. I hope you get a chance to spend it with your favorite people. I appreciate each one of you who visit my blog.


Labels:
cuttlebug,
gift card holder,
origami,
special folds,
Spellbinders
Subscribe to:
Posts (Atom)