Hi friends. I just had to share a couple more sonobe balls. I'm not really calling these ornaments, because they are just too big for the tree.
When I first started making these, I was curious as to how well it would work using brown paper bags, not the flimsy flat ones, but the heavy ones from the grocery store.
I made two different sizes, two with 4" squares and one with 6" squares. It is definitely easier to put together the larger sizes, but I did find out that because this paper isn't as smooth, that was actually an obstacle when putting the pieces together. I think it would have been close to impossible to use this paper on a smaller ball.
The gold one is painted with gold Lumiere paint. And for the one in the front in this next picture, I stamped each square with a burlap background stamp from Cornish Heritage Farms in coffee archival ink. After it was all put together, I coated it with matte Mod Podge. I love how that one turned out.
And just for comparison, here is the biggest one along side one of the ornaments. I think I'm going to paint the large one, but I haven't decided on a color yet.
You can really see the detail of how the pieces are tucked into each other.
Thanks so much for stopping by.
Showing posts with label sonobe. Show all posts
Monday, December 8, 2014
Sunday, December 7, 2014
experiment
Hi friends. If you've read my last couple of posts, you know that I've been making sonobe ornaments. All of them have been made using recycled paper - some that has been printed on one side and discarded for some reason or other,
and some that was (glossy) magazine or catalog pages.
I have discovered that the glossy paper isn't very receptive to some of my paint, so I either must use the colors that will cover the print, or first coat the paper with gesso. Both are great solutions, but the gesso is just an extra step, and drying time prolongs the process. The computer printer paper works much better for the lighter colors of paint.
The problem -- I made a lot (and I mean a LOT - well over 100) of the ornaments in glossy before I discovered that little problem. This is a grocery bag about half full. These are just the unfinished ones. I have many on my tree and have given away quite a few as well.
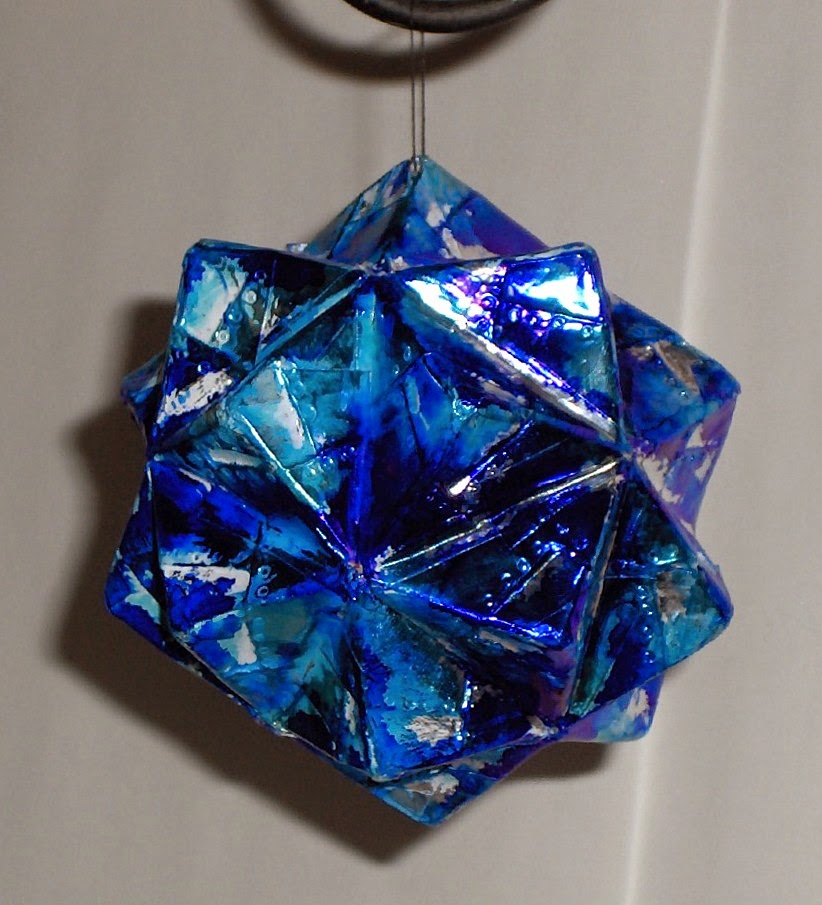
As long as I had a good supply to work with, I decided to try a technique called faux metal figures. It requires that you completely cover your piece with foil adhesive tape. Needless to say, this took a long time because of all the pyramids and valleys. Then you use the point of a pen, stylus, mechanical pencil, etc. to make 'rivets'. Sadly, these barely show in the finished piece.
When I came to this point, my ornament was very shiny and bright. I wanted to tone it down a bit, so I tried white acrylic paint. Because the tape doesn't absorb any liquid, I had to wait a long time for the paint to dry. By that time, I knew I didn't like the paint on it. I attempted to remove the paint, but it was impossible to get it out of the crevices. Frustrated, I decided to cover it as much as possible, so I used polished stone technique with alcohol inks. I left much of the tape uncolored.
Although not entirely happy with the end result, at least I was able to salvage it after all the work of applying the tape.
Thanks so much for stopping by.
and some that was (glossy) magazine or catalog pages.
I have discovered that the glossy paper isn't very receptive to some of my paint, so I either must use the colors that will cover the print, or first coat the paper with gesso. Both are great solutions, but the gesso is just an extra step, and drying time prolongs the process. The computer printer paper works much better for the lighter colors of paint.
The problem -- I made a lot (and I mean a LOT - well over 100) of the ornaments in glossy before I discovered that little problem. This is a grocery bag about half full. These are just the unfinished ones. I have many on my tree and have given away quite a few as well.
As long as I had a good supply to work with, I decided to try a technique called faux metal figures. It requires that you completely cover your piece with foil adhesive tape. Needless to say, this took a long time because of all the pyramids and valleys. Then you use the point of a pen, stylus, mechanical pencil, etc. to make 'rivets'. Sadly, these barely show in the finished piece.
When I came to this point, my ornament was very shiny and bright. I wanted to tone it down a bit, so I tried white acrylic paint. Because the tape doesn't absorb any liquid, I had to wait a long time for the paint to dry. By that time, I knew I didn't like the paint on it. I attempted to remove the paint, but it was impossible to get it out of the crevices. Frustrated, I decided to cover it as much as possible, so I used polished stone technique with alcohol inks. I left much of the tape uncolored.
Although not entirely happy with the end result, at least I was able to salvage it after all the work of applying the tape.
Thanks so much for stopping by.
Subscribe to:
Posts (Atom)