Showing posts with label butterfly quilt. Show all posts

Saturday, November 17, 2018

butterflies continued...

Well, hello!  I can't believe I haven't posted in almost a whole year - since January.  Shame on me!

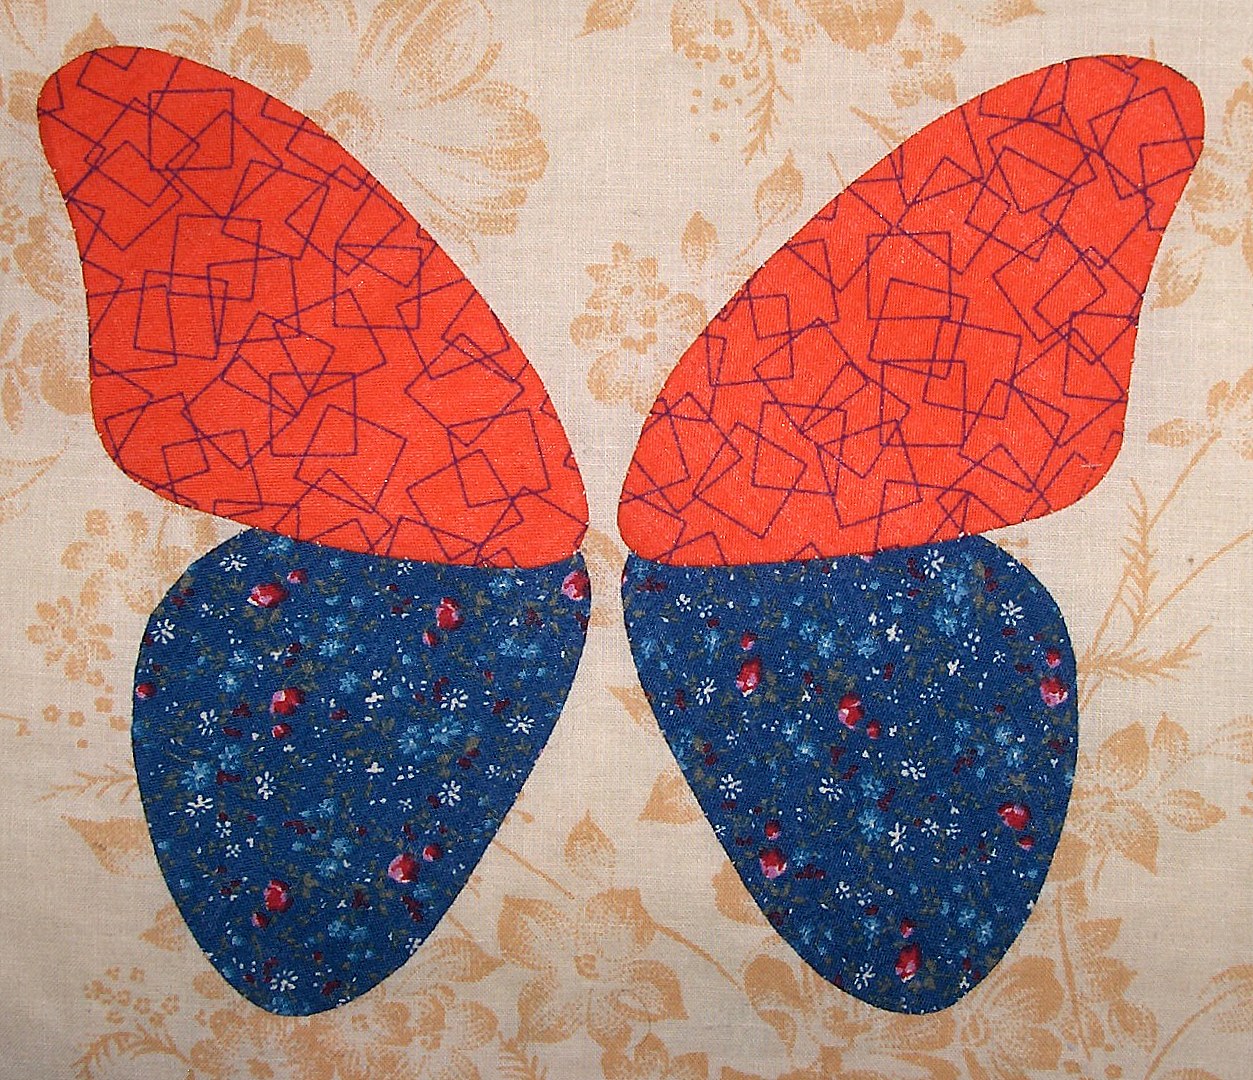
If you remember, back in 2016, I wrote a post about a butterfly quilt that I was making using hand applique.

Well, a few months ago, I finally had all the blocks finished and ready to put together.  Once a month I get together with some other ladies at a bobbin lace guild meeting in Fort Atkinson.  We meet in a good sized room at the local library, so I knew I'd have some floor space.  I took all my butterfly blocks and laid them out on the floor in rows.  Then I played with the positioning of the blocks, trying to separate like colors, so that I didn't have a glob of one color.  Of course, it helped to have input from the other lace members as well.  There really isn't a "perfect" layout, because it's a scrap quilt, so at some point, I just had to say "done" and go with it. 

As you can see, I must have been having so much fun making the blocks, that I have four extra.  Or when I was counting, the fabric stuck together, and I counted wrong.  Hmmm... the beginning of new project?

Once I was satisfied with the layout, I took a few pictures on my phone, and then pinned a block number on each block (A1, A2, etc.), so I would know what order to put them together (just in case they got dumped - gasp! and all out of order).  I removed all the pins after the blocks were sewn together. 

Here's a couple of pictures of it on a bed. 

The blocks are sewn together, but I haven't decided what to do for the antennae.  I may just do those as part of the quilting.  I may or may not add a narrow border around the outside.  And I have yet to choose some backing material and put the layers together. 

And here's a close up of a small portion. 

I want to hand quilt this, so I'm sure it will be years before it's finished.

The extra blocks may end up like these pillows.  The pillow casing overlaps in the back so the pillow can be slipped in.  The band just slips over the pillow.  You can change the bands for seasonal decorating, and it makes for easy laundering.

Thanks so much for stopping by.  

Tuesday, May 24, 2016

butterflies

Hi friends.  A couple of weeks ago, I started working on a new quilt - hand applique butterflies.  I know it's a big project, but I love that it's portable until the blocks are all sewn together. 

I like to use freezer paper when I do hand applique.  That means cutting each piece from freezer paper (which I do in multiples) - I fold the paper twice, trace the pattern as many times as will fit on the folded sheet, then staple the center of each & cut them out.  I iron the shiny side to the wrong side of the fabric & cut those out with an additional 1/4" seam allowance.  I don't measure that, just guess.  Then I clip any curves and glue the seam allowance to the freezer paper with a washable fabric glue. 


For this quilt, I just pulled scraps from my stash.  I only needed enough to have matching upper or lower wings, but I cut both from many of the fabrics.  I am not putting any of the same upper and lower fabrics together on the same block.  This picture just shows some of the pieces.  These are prepped, but not sewn yet.  The stack in the lower left is just a small amount of wings that I've paired upper & lower. 

I also needed to choose background fabrics for the blocks and I don't want to use 2 the same.  The finished blocks will be 9", so I'm starting with 10" blocks, & will trim any extra off to 9-1/2" after the butterflies are sewn on.  That will allow for any variance if my stitching is tighter on any blocks. 

The plan is to make 90 blocks (9 x 10).  I think I have enough wings cut & prepped, but still need to choose more backgrounds.  As you can see from the pictures, I'm using both light and dark fabrics for the wings as well as the backgrounds. 


I made a basic template block from paper with the butterfly drawn on, so I can put it on my light table, lay the fabric on top & glue the wings down.  This way I can be sure that I have the butterflies centered on the blocks.  I roughly timed how long it takes to stitch all the wing pieces on & that was about an hour. 

Once the wings are stitched (blind stitch by hand), then I cut out the backing, leaving the seam allowance.

I then soak the block in warm water for a couple of minutes and pull out the paper. 

Once the block is dry, it gets pressed and is ready for the butterfly body. 
I haven't sewn any of the bodies on yet, but the process will be the same as the wings. 

Thanks so much for joining me today.  I hope you'll follow along on this journey.  I'll try to post more pictures as I go along.