Showing posts with label gesso. Show all posts

Friday, March 5, 2021

a big M

 Hi friends.  How time flies.  I've been working on something a little different this week.  A few years ago, I picked up a big letter M.  It's 12" across and 12" high.  I think it's made of wood, because it's pretty heavy.  But it's covered in vinyl.  Unfortunately, it was PINK, and I don't do pink.  I wasn't sure what I wanted to do to it, so while I procrastinated, it sat.  

One day I decided to try and paint it, using acrylic paints.  I used blue, but it really didn't cover well, so it sat some more.  

I finally decided that I was really going to do something.  I tried painting over it with brown, but that didn't work either.  Finally, I decided to cover it, so I tore up some old music and proceeded to decoupage it with the music.  I already liked it better, but still, I wasn't what I wanted.  

So I got out my gelatos, and scribbled just a little with blue and turquoise.  Then I grabbed my watered down gesso and a paint brush.  The gesso smooths out the gelatos, but, because it's diluted, it doesn't completely cover whatever is underneath.  This is exactly what I wanted.  

But it was still too plain.  So I pulled out one of my favorite stamp sets, Petal Prints from Stampin' Up and stamped one image randomly all over the letter with ultramarine stazon ink.  Now, I was really liking it.  

But I decided to go one step further and add some flowers.  Daisies and butterflies.  I played around with them for awhile and decided on a layout, but it was late, and I was too tired to do leaves, so I just left it on the table.  When I came down the next morning, the flowers were all rearranged, in a nice neat pattern up and down the legs of the M.  Someone was in trouble!  And since I hadn't bothered to photograph the layout, I had to go through that process all over again.  Then I glued the flowers and butterflies down, and realized that I had forgotten the leaves.  So I cheated.  I punched leaves and sponged the edges.  Once I decided where I wanted to put them, I glued them on right over the top of the flowers.  Then I stamped a few more flowers and cut them out and glued them on top.  Not quite the way it should have been done, but I was not going to try and peel off the first ones.  I probably would have messed up everything, and I had already spent too much time to mess it up, so I just fixed it the easy way.  You can't tell by looking at it anyway, so it's all good.  I gave it two coats of decoupage finish and it's done. 

And I have to say that I really LOVE how it turned out.  


Thanks so much for taking time to stop by for a visit. 

Sunday, September 20, 2015

autumn leaves

Hi friends.  I love autumn.  I think it's my favorite season.  I love the rich, vibrant colors of the fields and trees.  I love the crisp, cool air.  And I love the smell of burning leaves.  We've had a few cooler days and nights.  It was in the upper 40's this morning. 

My card making tends to reflect the current season, so I made some with autumn leaves.  This one was made for the mixability challenge on SCS. 
The background was done with a brick stencil and gesso.  Once the gesso was dry, I sponged turquoise ink over it and then wiped most of the ink off the gesso.  The leaves and acorn are stamped with wonderfall (SU) and cut out.  I added a lot of sponged color to the leaves.  Both colors of burlap are ribbon.

The 2nd card was made for the inspiration challenge on SCS, which was a zentangle site.
 
I used the die that matches the stamps from the first card, but did not use the stamps for this one.  On the die cut leaf, I added vein lines and then just starting doodling.  I used colored pencils and white gel pen to enhance the doodles.  I love how it turned out. 

The background is a rubbernecker stamp. The light green layer was actually a light yellow cardstock, but I thought a green would match better and bring out the green on the leaf.  Since I already had it glued to the black backing, I just sponged it with green to change the color.  All just part of the way I create as I go.  Not too much planning.  Even when I do plan ahead, I usually end up changing things along the way anyway. 

Thank you so much for taking time to stop by for a visit.

Thursday, February 5, 2015

and more calendar art

Hi friends.  Here are some more days from my calendar art that I did late last night.

Thanks so much for stopping by.

more calendar art

Hi friends.  So far I've been doing well at keeping up each day on the calendar art.  I've also been working backwards on January, filling in the days I missed, since I didn't start until the last week of the month.  Here are the additional days I've done so far. 


Thanks so much for stopping by.
 

Saturday, January 31, 2015

January 31st... really?

Hi friends.  How time does fly!  I'm not sure what I was thinking, but I was sure that tomorrow was the end of the month.  I guess that means I need to do at least 2 every day on my calendar art for awhile.  I need to catch up!

And just to show you how mixed up I am on my days, I have two from yesterday that I didn't post yet.

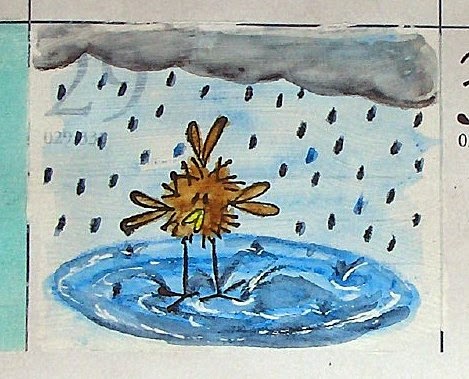
The mixability challenge on SCS called for raindrops.  I used a little dorky bird from Judith.  And the free for all challenge called for teeny art.  Natural beauty's little bird to the rescue.  

I made one late last night and another this morning.  The first one was just a quick draw - for sure nothing fancy.  My drawing skills have never been enhanced by any education. 

For the second one, I wanted to use my favorite retired SU stamp set.  The one problem I've always had with this set is that the single flower and butterfly have some sketch lines on them that I don't like, so I typically would cut these images out.

I really didn't want to have to do that on my calendar, so I decided to do some long-needed surgery.  I took my exacto knife and cut off the lines!

I love them now.  I don't know why I didn't do that years ago.

So with a bit of masking, I used both the flower and butterfly, and then colored them with inktense pencils and a water brush.

I also drew in a few leaves.

I'm having so much fun with these tiny little spaces.  It usually doesn't take much time to finish one, so I haven't spent all day on it, but have still managed to get in a little creativity time.

Thanks so much for stopping by.  


Thursday, January 29, 2015

more calendar art

Hi friends.  I decided I'd better get my calendar art done before the day was over. 

I glued the piece I had done yesterday on the January calendar, so I didn't have to make an extra piece. 

I had pinned a dala horse on my blue Pinterest board, and thought it would work for a tiny piece of art.  I did a google search for images, and printed one in the size I needed.  Then I cut around it and used the negative piece of paper as a stencil to sponge some blue acrylic paint on the date.  Once that was dry, I sponged some cool caribbean ink around the horse.  Then I decorated the horse with a white gel pen. 


Thanks so much for stopping by. 

Wednesday, January 28, 2015

calendar art

Hi friends.  My friend, Lydia, recently started an on-going art project called calendar art, where each day you do a little art on the date for that day.  To say the least, I was intrigued. 

Being on a limited budget, I decided to see if I had anything I could work with that didn't require a purchase.  I found this old desk calendar from 2010 (yes, I know the date on the front is 2009, but that's because it has November and December included.

The first thing I needed to do was a test to see if this would work, since it was likely to get wet (gesso, watercolor, etc.).  I was also concerned whether or not the big xpedx would show through.  So I used some post-it notes to block off a square with one of the letters in it, slipped some plastic underneath the page and painted the square with gesso. 

Once the gesso was dry, I stamped some images from an SU set, fast & fabulous, added a couple of leaves on the big flower, and then colored with inktense pencils and a water brush.

When it had dried, I was pleased to note that the paper is still pretty flat, so I think this will be the calendar I work on.  I'm not concerned that the days won't match the current year.

I trimmed the calendar down a bit by removing the months along the bottom, the notes area on the right, and a bit of the top.  I plan to use comb binding to hold it all together, but I want to make some sort of front cover first.  I'm still working on that. 

Thanks so much for stopping by. 

Sunday, December 7, 2014

experiment

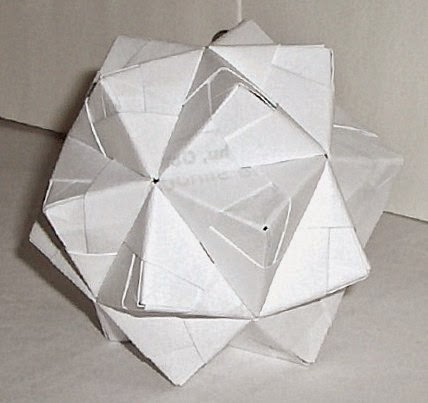
Hi friends.  If you've read my last couple of posts, you know that I've been making sonobe ornaments.  All of them have been made using recycled paper - some that has been printed on one side and discarded for some reason or other,

and some that was (glossy) magazine or catalog pages. 

I have discovered that the glossy paper isn't very receptive to some of my paint, so I either must use the colors that will cover the print, or first coat the paper with gesso.  Both are great solutions, but the gesso is just an extra step, and drying time prolongs the process.  The computer printer paper works much better for the lighter colors of paint. 

The problem -- I made a lot (and I mean a LOT - well over 100) of the ornaments in glossy before I discovered that little problem. This is a grocery bag about half full.  These are just the unfinished ones.  I have many on my tree and have given away quite a few as well. 

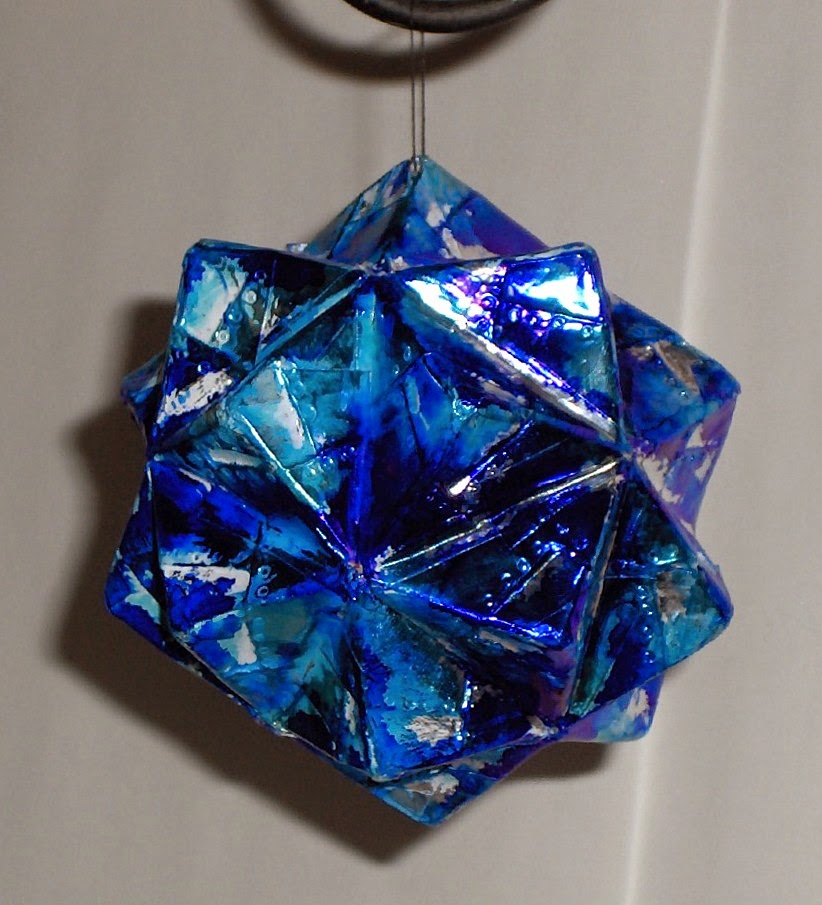
As long as I had a good supply to work with, I decided to try a technique called faux metal figures.  It requires that you completely cover your piece with foil adhesive tape.  Needless to say, this took a long time because of all the pyramids and valleys.  Then you use the point of a pen, stylus, mechanical pencil, etc. to make 'rivets'.  Sadly, these barely show in the finished piece. 

When I came to this point, my ornament was very shiny and bright.  I wanted to tone it down a bit, so I tried white acrylic paint.  Because the tape doesn't absorb any liquid, I had to wait a long time for the paint to dry.  By that time, I knew I didn't like the paint on it.  I attempted to remove the paint, but it was impossible to get it out of the crevices.  Frustrated, I decided to cover it as much as possible, so I used polished stone technique with alcohol inks.  I left much of the tape uncolored. 

Although not entirely happy with the end result, at least I was able to salvage it after all the work of applying the tape.

Thanks so much for stopping by.  


Friday, December 5, 2014

a little box

Hi friends.  I can't believe that I didn't post even once the entire month of November!  My bad!  I've been busy making origami sonobe Christmas ornaments and Christmas cards.  I don't even know how many sonobe ornaments I've made, because I've given many of them away.  I know the number is well over 100.  I made a lot of them with glossy pages from old mini catalogs from when I was a demonstrator for Stampin' Up!  

I've been painting them with Lumiere paints, but some of the lighter colors don't cover over the print.  I either have to use the colors that do cover, or start with an undercoat of gesso, which certainly adds to the time required to complete them.  I did find that I can use paper that had been through my printer and had been discarded for some reason.  I just need to fold all the printing to the inside, leaving the outside clean and white. 
I wanted to send one of these ornaments to a friend, so I decided to make a pretty little box to hold it.  I know this friend likes blue, so I'm giving her a blue ornament.  The box is turquoise, navy and white. 

I started with a 9" square of turquoise cardstock and scored at 3" and 6" in both directions using my Scor-Pal.  I trimmed out the four corners, leaving 1/2" tabs for gluing the sides together.  For the top, I used a 5-1/8" square and scored 1" from each side and trimmed the corners the same way as for the box bottom.  Before I glued the sides, I used a die from Spellbinders labels sixteen to make a cutout in the cover.  I attached some clear acetate inside the cover for a window. 

To decorate the box, I cut navy cardstock about 1/4" smaller than the sides and topped that with white labels sixteen, which I embossed with textile embossing folder and sponged with turquoise ink. 

On the sides of the cover, I added navy cardstock.  On the top four corners, I added small photo corners punched from navy cardstock. 

The box is 3"x3"x3" and the ornament fits just a bit loosely inside, so I'll add some tissue paper to make it look pretty and keep it from bouncing around. 

I've hung quite a few of these on my tree.   But I think it's more fun to see someone's face light up when you give them one.  I surprised the mail lady with one yesterday. 

I'm entering this box in the Scor-Pal blog challenge More than one Score #11 - Anything Goes.  Thanks so much for stopping by. 

Friday, November 8, 2013

you are a blessing

Hi friends.  Friday is the day for mixability challenges on SCS -- or mixed media.  I have intentions to do them all, but have not been very faithful.  Today's challenge was no paper.  In other words, your card base could be paper, but all other layers had to be something other than paper. 

I started with a piece of tan canvas, on which I put two coats of gesso.  I didn't want to  completely cover it, just enough to get a lighter background to work with. 

Then I got out one of my handmade stencils and used distress paints to make the flower.  I then sprayed some brown and blue spray paint (which also was DIY). 

I stamped the sentiment (alias smith & rowe) and the butterfly (hero arts) with jet black archival ink.  There were a couple of spots that didn't stamp well on the canvas, so I just used a pigma marker to fill in any missed lines.  Then I used a copic marker to color the butterfly.  I was really careful with that, because it was picking up some of the black ink, and I didn't want it to be all muddy.

I inked the edges with vintage photo distress ink. 

Thanks so much for stopping by. 

Friday, August 30, 2013

word play - g

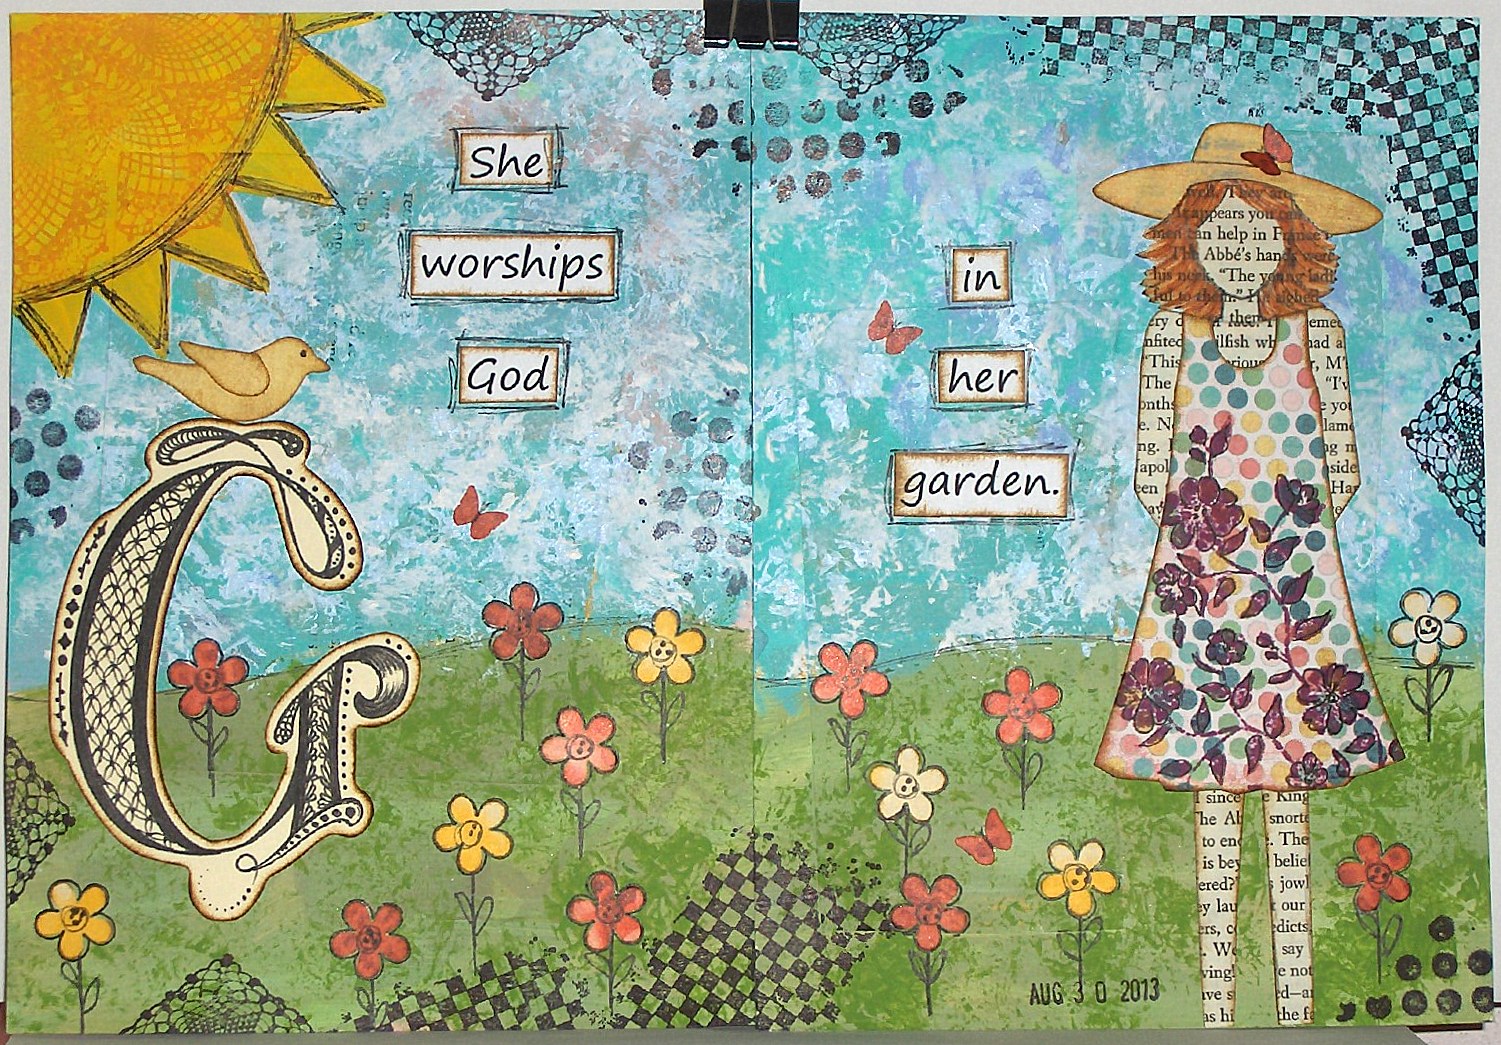
Hi my friends.  How about another page spread from my word play journal?  To see all the completed pages, click here.  There's a challenge in the OWSE Yahoo group for the month of August, to create something that refers to what we did this summer.  So, I'm cutting it pretty close to the deadline, which is tomorrow. 

I have what I refer to as my garden.  What it really consists of is four large half-barrels, in which I planted tomatoes.  This is my third year, and what I would consider my first successful one.  The last two years apparently were not good ones for growing tomatoes, because I got very little produce from any of the plants.  But this year I'm happy with how many tomatoes I'm getting.  And the best part -- they are soooo yummy. 

So I made my page spread about a garden.  I have a number of the new Prima mixed media dolls by Julie Nutting, but I didn't think their dressy/flirty style fit with my garden theme, so I decided to try a 'she art' doll.  This is my first attempt, and I'm happy with it.  I used an old book page and designer paper.  The dress is also stamped with flowers.  After cutting out the hat, I cut a slit to fit her head into. 

When I started this journal, I created the base for each page right at the beginning, but for this page, I covered it all up with paint, since it just didn't match my theme. 

To get the texture in the sky, I pounced a stencil brush and gesso over the blue paint. 

The sun is painted, outlined and stamped with a doily stamp.  The flowers are punched and outlined.  The stems and leaves are hand drawn. 

The 'G' is hand drawn and zentangled.  The sentiment is computer generated.   The bird is cut with a Sizzix die and the butterflies are punched with a Martha Stewart punch. Most of the pieces on this spread have been edged with vintage photo distress ink. 

I also did some random stamping with a Gina K. stamp and Tim Holtz stamps. 

Thank you so much for stopping by today.  I hope you have a wonderful weekend. 

Saturday, August 24, 2013

word play - F

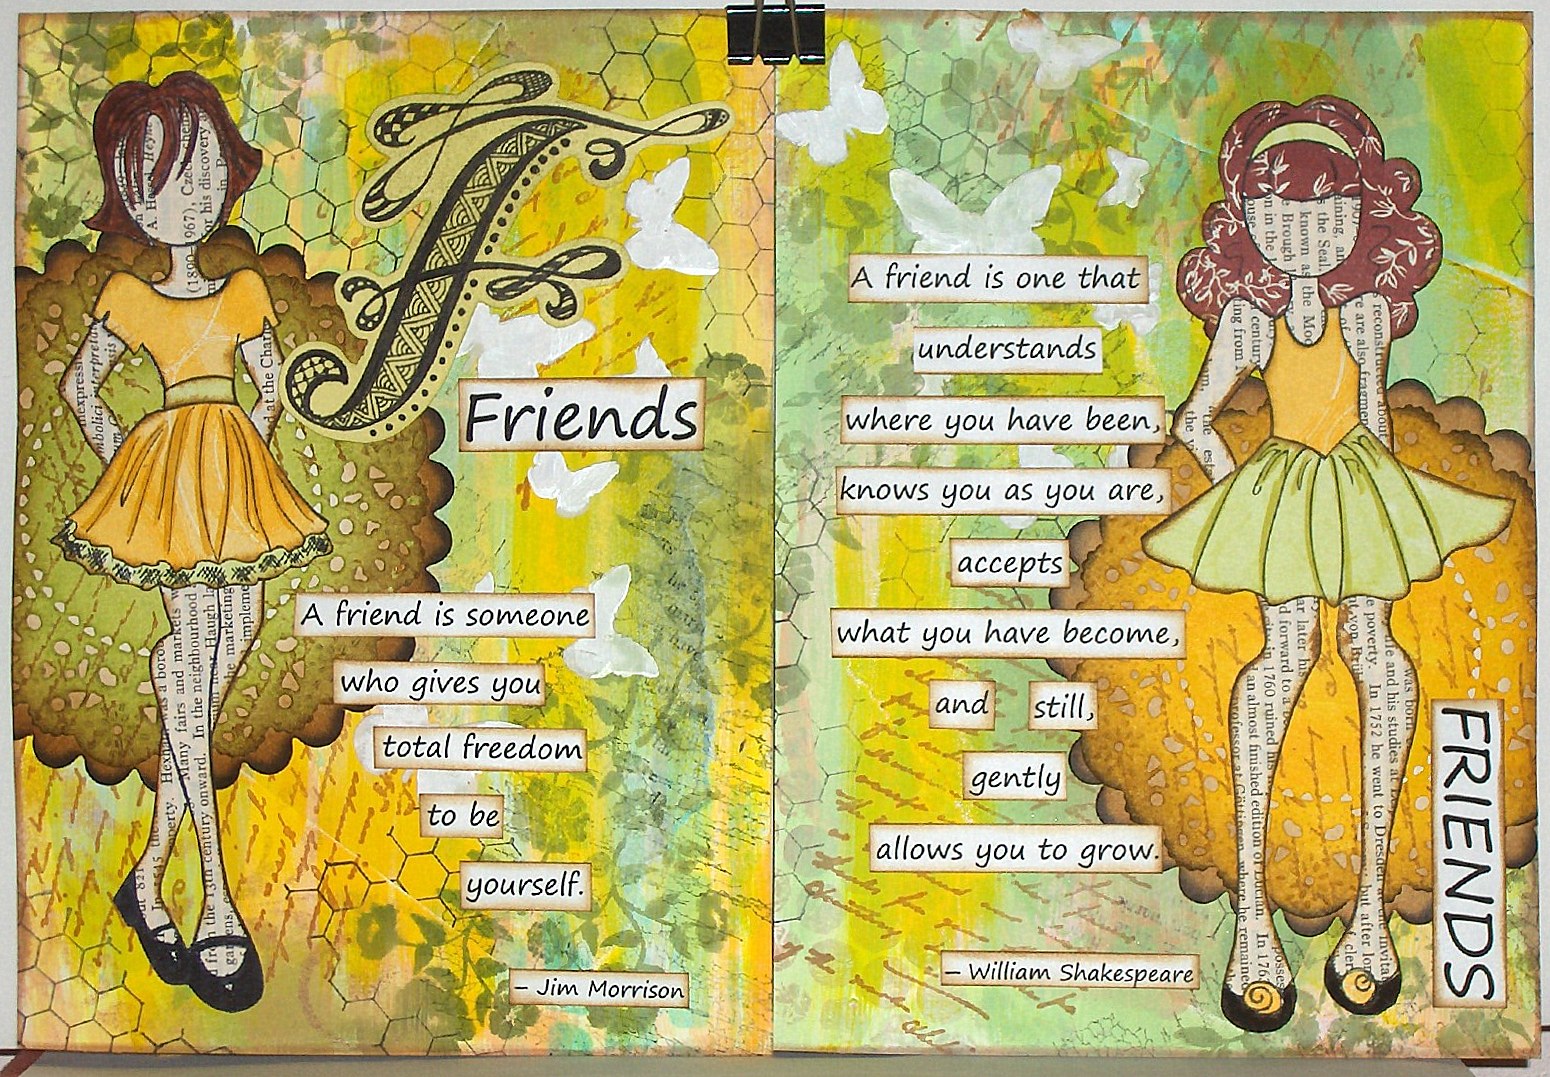
Hi friends.  Another spread in my word play journal.  I told my daughter that this was my 'F' word, and she just snickered.  But no bad language here.  My word for the letter F is friends.  You can find all the completed pages here. 

I wanted to make something for the weekly challenge on the OWSE facebook page, I decided to to make another spread for this journal.  There were some choices for colors, and I chose green and yellow.  This is really not one of my favorite color combinations, but I guess I need to step out of my box once in awhile.

Although the background of the pages was done previously, I added more color with both paint and ink.  Then I did a bunch of stamping and added some texture with modeling paste and a butterfly stencil (Red Lead).  In a couple of places, the ink underneath bled through the modeling paste, so I went over that with white acrylic paint.  It didn't completely cover, but I thought it wasn't too noticeable, since the background is pretty busy anyway, and I was going to cover up a lot of it with the dolls and the words. 

I used two of my new Prima mixed media dolls by Julie Nutting.  I have a hard time remembering the names.  I first glued a page from an old encyclopedia onto a piece of this card stock and then stamped the dolls on that and cut them out.  I paper pieced the clothes and the hair on one. 

Behind the dolls are die cuts of a French pastry doily die (Cheery Lynn Designs) and a Sizzix scalloped circle. 

The words were printed on my computer and cut out.  The edges on everything are sponged with vintage photo distress ink.  The letter F is done with zentangles or zendoodles, whichever you want to call it.

Thanks so much for stopping by. 

Wednesday, July 3, 2013

life is good

Hi friends.  Happy Independence Day to all my friends in the USA! 

I recently joined another facebook group - this one about art journaling.  There are lots of prompts and challenges.  It's been some time since I've really done any pages, so I thought this would be a good opportunity to jump back in.  The first challenge was to use two colors of paint, gesso, and some designer paper or old book pages, or some such. 

I normally start all my pages with a coat of gesso, but simply forgot to do that on this one. 

I dripped some paint on the page and then used an old plastic gift card to drag the paint across the page.  I used two different colors separately. 

Then I used a crafter's workshop stencil, mini echoes, and painted gesso through the stencil.  I didn't care for the darker color.  It was much too bold, so I then used a gesso wash and painted over the entire page.  That was much better. 

I wanted to use one of the new Julie Nutting mixed media doll stamps, so I stamped the doll with ruffles with jet black archival ink and colored it with inktense pencils and a water brush.  Then I cut it out. 

I cut some strips of pattern paper that matched the colors on the dress.  I cut the scallops freehand and layered the paper on the edges. 

I pulled out an old flower stamp that I've had for years and never used (really?) and stamped it randomly over the background in purely pomegranate ink and bermuda bay ink. 

Next I attached the doll. 

The final step was printing a sentiment, cutting apart some of the words, sponging around the edges, and gluing them down. I'm happy with my page. 

Thank you so much for stopping by. 

Friday, June 14, 2013

moonflowers

Hello friends.  A couple of days ago, a challenge was issued in one of the facebook groups that I'm in.  The challenge was to create something inspired by the following quote:  "When the earth smelled of summer and the sky was filled with night..."

I wanted to find out where the quote was from, so I did a google search and came up with the following:

Hello Young Lovers (from the King and I)

Anna, when I think of Tom
I think about a night
When the earth smelled of summer
And the sky was streaked with white

And the soft mist of England
Was sleeping on a hill
I remember this
And I always will

There are new lovers now on the same silent hill
Looking on the same blue sea
And I know Tom and I are a part of them all
And they're all a part of Tom and me

Hello young lovers, whoever you are
I hope your troubles are few
All my good wishes go with you tonight
I've been in love like you

Be brave young lovers and follow your star
Be brave and faithful and true
Cling very close to each other tonight
I've been in love like you

I know how it feels to have wings on your heels
And to fly down the street in a trance
You fly down a street on a chance that you'll meet
And you meet – not really by chance

Don't cry young lovers, whatever you do
Don't cry because I'm alone
All of my memories are happy tonight
I've had a love of my own

I've had a love of my own like yours
I've had a love of my own

The line was unintentionally misquoted, but it worked anyway for a great challenge.  The first thing that came to mind was moonflowers.  Although I've never actually seen a moonflower, I knew that I could find images online.  My flowers don't look exactly like moonflowers, but since this is art, it doesn't matter.  

It has been a long time since I've done an art journal page, so I pulled out a journal page that I had done the background on months ago and decided to use it.  

I added some leaves with green acrylic paint using one of the stencils that I made recently. 

Then I stamped some flowers from a SU set called Secret Garden.  I sponged the centers with light green ink and added some dots of white acrylic paint with a toothpick that I cut the point off of.  I glued on the flowers and added the sentiment, which I printed on the computer. 

Thanks so much for stopping by. 

Tuesday, June 11, 2013

my first canvas ever

Hello friends.  This week I've been busy creating cards for my class on Thursday.  Once I finished, I decided to play a little bit.  There's a challenge to make something with the technique (masking on collage) that was presented last week at our OWSE Art Techniques Club meeting, so I made a canvas, my first ever.  It's 14"x11", much larger than anything I normally create.  Nothing like stepping out of my little box.  I'm glad I did it though.  It wasn't nearly as intimidating as I thought it would be, and was rather fun to work on a much larger space. 

I started by forming a collage with a bunch of different pattern papers.  Then I used a Sizzix butterfly die to make two masks from some recycled chipboard boxes. 

Then came paint, removing some of the paint to allow some of the papers to show through, spray inks and stencils, modeling paste with a stencil, and some stamping. 

Then I removed the masks.  I stamped some buttons from a SU set called button, button.  I punched them out, pierced the holes and used a Pitt pen to draw on thread.  I used the buttons for the butterfly bodies. 

I printed the sentiment on my computer, cut it apart, and added some ink before gluing the words to the canvas. 

I don't think it's fabulous, but neither do I dislike it.  I would prefer that the butterflies were a single paper and that they stood out more, but since they were part of the technique, I really couldn't change them for the challenge. 

Creating on a canvas was definitely a learning experience for me, and I know I'll be doing more of these.

Thank you so much for stopping by. 

Sunday, April 28, 2013

bell flowers

Hi friends.  I think maybe my mojo is sneaking back.  I sat down to create this morning and it happened!

Robyn over at OWSE Yahoo group presented us with a quick fire challenge this morning to create something with either birds or bees.  I decided to make another page to go in the journal I started in January (21 cards) for Motley Soul Mixed Media Art. 

The page is 4"x6" made from cereal box chipboard, covered with coffee filters, gesso and paint.  The background was already done, and I chose to just work with it as is. 

I found the chipboard vine (Sizzix) in my stash and covered it with vintage photo distress ink. 

Then I die cut a bunch of the tiniest flower on the tattered florals die (Tim Holtz) from a blue card stock and sponged the petals with seedless preserves distress ink.  I snipped into the center between two of the petals and then used a stylus and my fingers to form the flowers into a bell shape.  I glued them onto the vine and added some highlights on the petals with a white gel pen.  A black sharpie was used to make the stamen.  The flowers look really flat in the photo, but they are actually very dimensional and stand out about 1/4" from the page. 

The bird from caged bird (Tim Holtz) was die cut from the same blue card stock, embossed with tiny mosaic embossing folder and sponged with seedless preserves.  I attached the bird with dimensional tape. 

The sentiment was hand written with a sharpie marker. 

I'm also entering this in the mix-ability challenge #13 and the free for all challenge #166 on SCS. 

Thanks so much for stopping by.  Have a great week.