Showing posts with label Spellbinders. Show all posts

Tuesday, October 13, 2020

more round boxes

 Hi friends.  Can you tell I like making these little boxes?  I made one for a contest that required a pumpkin.  So... I made the pumpkin... a pumpkin box actually.  

And a better view of the cover.  

I used some silk leaves, which I cut down a bit so they fit better.  I went outside and picked up a few sticks to use as a handle.  They were really dry, so I hope it doesn't break.  But I guess it would be easy enough to replace if it did.  

This next box was a special request by my cousin.  She really liked the floral one I made, so this is pretty similar.  I used a different flower stamp, and the flower on the cover is paper, whereas the other one was silk.  

And here is the cover.  I punched and die cut some different sized flowers, and cut the petal separations deeper.  Then I sponged all the edges with candied apple distress ink.  I turned them over and used a stylus and a thick foam mat to give them more shape and dimension.  Then I glued all the layers together, added some leaves, and glued the flower onto the cover.  

I remembered that I had some decoupage medium (hmmm... actually I have four jars) that would work to give this a nice smooth finish.  Although I didn't check, I'm pretty sure that all the jars have been opened, so hopefully, they are still all usable.  The one I used just needed to be stirred a bit before use.  I normally use matte mod podge, but I only have a little bit left, and I've been procrastinating going shopping for more.  Plus, sometimes it leaves the surface a bit sticky.  I think that may have something to do with the humidity.  I've really been trying to use up what I have instead of buying more.  A while back, I was watching a video, and the girl used a 1:1 mix of water and white glue as a finish.  I absolutely would do that, but I've also used almost all of my white school glue, because I ran out of tacky glue, which is really my favorite for putting this type of project together.  I like it because it's not so runny and dries with less bubbling.  But I found if I use a very thin layer of white glue, that works quite well, too.  

Thank you so much for stopping by to visit.  I always appreciate that. 


Tuesday, January 12, 2016

a few more vsn cards

Hi friends,

Here are a few more of the cards I made for VSN on Splitcoast last month. 


If you'd like more details on how I made these, click on the green button in the sidebar for my Splitcoast gallery. 

Thanks so much for stopping by. 

Thursday, January 7, 2016

and then December happened

Hi friends.  I was going to try to blog a little more often... and then December happened.  I worked like crazy to get my Christmas cards all finished, addressed, and sent.  And I also volunteered to be a hostess for December's VSN on Splitcoast.  The theme was Around the World in 80 days.  For challenges, we picked a country and something pertaining to that country.  My challenge country was Indonesia and my challenge was to make a card using some type of batik technique or fabric. 

This card has a background created with the acrylic batik technique.  

This next card uses batik fabric.  A number of years ago, I was given a bunch of fabric pieces by a lady who was moving and didn't want all her quilting scraps.  Included were a lot of small scraps, but there were also some larger pieces.  This fabric was was part of that. 
I glued the fabric onto some cardstock and then die cut the circles. 

Along with having my own challenge, hostesses are asked to make samples of the other challenges if we have time, so I did that also. Here are a few of those samples. 


I'll share more of these soon.  Thanks for stopping by today. 

Monday, September 21, 2015

pumpkins

Hi friends.  Are you a lover of all things pumpkin?  I certainly enjoy many things made with pumpkin.  A number of years ago, I bought about 10 good sized pumpkins for a bargain price.  And then I canned pumpkin.  And canned more pumpkin.  And cannned...  You get the picture.  I'm still using that canned pumpkin - pumpkin bread, pumpkin muffins, pumpkin cookies, pumpkin dessert.  And I can make pumpkin something any time of the year.  It doesn't have to just be in the fall.  This week I made a pumpkin smoothie.  It was good, but I think I need to tweak the spices a bit.  And add some caramel syrup. 

So what else but a pumpkin card?  The free for all challenge on SCS this week was to use a pumpkin on your project. 

I used nested pumpkins dies from spellbinders to cut cereal box chipboard and designer paper for the pumpkin.  I sponged the edges with pumpkin pie & vintage photo inks. 

The flourish was already die cut (I think that's a sizzix die).  I die cut 2 leaves with assorted leaves dies (an old spellbinders set).  I sponged the leaves with always artichoke ink.  Then I spritzed them with water and crumbled them up and then flattened them back out partially.  Once they were dry, I adhered them to the pumpkin. 

The background is some designer paper and a couple of strips of dusty durango cardstock. 

The word thanks is a cuttlebug die and is die cut from black and cereal box chipboard.  I used a couple of layers of chipboard, because I wanted it to be sturdy. 

Thanks so much for stopping by for a visit. 

Thursday, September 17, 2015

double gate fold card

Hi friends.  Recently splitcoaststampers posted a tutorial for a double gate fold card.  Since I had been wanting to make one, it was the push I needed.  However, I did not follow the tutorial.  I wanted to use dies to make a different shape.  So I picked a die that was close in size to an A2 card (spellbinders labels 29). 

Using the largest die in the set, I cut one from white cardstock and two from designer paper.  I scored both pieces of designer paper down the center and folded them with the printed side out.  Then I created hinges from narrow strips of white cardstock (folded down the center), and I glued the hinges to the sides.  Although the hinges show a little, I don't think it diverts attention from the shape of the card. 


I stamped the flower (blended bloom - SU) on white cardstock and sponged the red ink on.  I wanted a really vibrant color, so I went over it again using a sponge dauber, which is more dense.  Then I used a dauber in the center with yellow ink.  Only half the flower is glued to the card, so that it overlaps the front, but you can still open the card. 

Thank you so much for taking time to visit. 

Friday, September 4, 2015

a card or two

Hi friends.  I don't know where the time has gone.  Somehow, more than a month has gone by & I haven't blogged.  I made two cards this week that weren't for one of my classes.  They were for the technique challenge on SCS.  The challenge was for a cute little fold up on the front of the card. 

When I looked at the instructions, I thought they sounded more complicated than was necessary, so I changed mine a bit.  I cut a piece of cardstock 3" x 8.5" and scored it at 2", 4", and 6", so that when folded, the back panel extended 1/2" above the rest.  Also, instead of using ribbon, I used hemp twine & used a punched circle with a brad to wrap it around.  

The folded panel is perfect for using a tall stamp.  Since I have many of the Prima mixed media doll stamps, I thought they would work great.  
School started on Tuesday, so I made the girly girl card for the neighbor girl across the street.  And her brother, who plays all kinds of sports, got a super jock card.  
Thanks so much for taking time to stop by. 

Saturday, January 17, 2015

awl snug

Hi friends.  I'm sorry that I've been so neglectful of my blog lately -- no special reason. 

Recently a friend told me that one of the local art supply stores was going out of business, so I thought I should go take a look at what they had.  The one thing I was really hoping to get was a heavy duty awl for bookmaking.  I was happy to find one. 

After taking a look at this thing, both my husband and daughter said that it looked like a weapon.  In truth, I would not want it to accidentally roll off the table and injure someone, although the weight of the handle would probably cause it to fall with the point up.  Anyway, in light of possible injury, I decided to make a box in which to keep it. 

I pulled out some cereal box chipboard and went to work.  I made the box with plenty of room inside, thinking I might want to put some kind of cushion in it.  I covered it with some pretty paper with butterfly stamps all over it. 

At first I made a small platform to fit in the bottom of the box and die cut an oval, so the tool handle would sit in the opening.  I made the opening too large, so I made another piece with a smaller opening and just glued it underneath the first one.  That worked well, but there was still too much space in the box.  One alternative would be to add some height to the platform.  But then I thought, if I make another platform inside the cover, it would hold the tool more securely.  That worked, but I wasn't quite satisfied. 

I decided that a piece of fun foam on top of the platform would give just a bit of cushion and hold the tool better.  I have quite a few sheets of fun foam, but.... they seem to have disappeared... I know not where!  As I was searching, I came across some packing foam that looked promising.  It has different properties than fun foam and is about twice as thick. 

I cut a piece to fit inside the box and marked where the oval should be.  I didn't think I could cut this with the die, so I used a craft knife.  I glued this on top of the cardboard platform. 

I also made another for inside the cover, but glued that one directly to the cover without the cardboard platform. 

I'm really liking this, but I decided to go one step further.  I cut another layer of the foam and shaped it to fit around the point and part of the handle of the tool, holding it nice and secure within the box.  I left some space where I could get my fingers in to pull the tool out of the box. 

I'm really happy with the end result.  The cover fits just tight enough that it isn't going to fall off, so I know the tool is secure inside the box. 

Thanks so much for stopping by. 

Friday, December 5, 2014

a little box

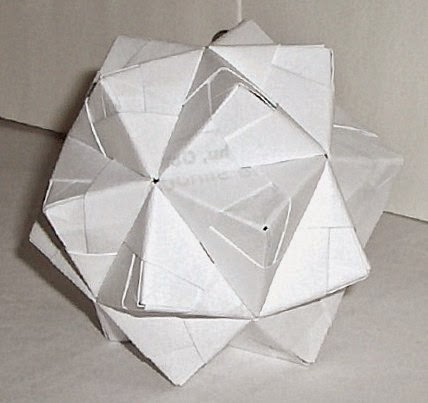
Hi friends.  I can't believe that I didn't post even once the entire month of November!  My bad!  I've been busy making origami sonobe Christmas ornaments and Christmas cards.  I don't even know how many sonobe ornaments I've made, because I've given many of them away.  I know the number is well over 100.  I made a lot of them with glossy pages from old mini catalogs from when I was a demonstrator for Stampin' Up!  

I've been painting them with Lumiere paints, but some of the lighter colors don't cover over the print.  I either have to use the colors that do cover, or start with an undercoat of gesso, which certainly adds to the time required to complete them.  I did find that I can use paper that had been through my printer and had been discarded for some reason.  I just need to fold all the printing to the inside, leaving the outside clean and white. 

I wanted to send one of these ornaments to a friend, so I decided to make a pretty little box to hold it.  I know this friend likes blue, so I'm giving her a blue ornament.  The box is turquoise, navy and white. 

I started with a 9" square of turquoise cardstock and scored at 3" and 6" in both directions using my Scor-Pal.  I trimmed out the four corners, leaving 1/2" tabs for gluing the sides together.  For the top, I used a 5-1/8" square and scored 1" from each side and trimmed the corners the same way as for the box bottom.  Before I glued the sides, I used a die from Spellbinders labels sixteen to make a cutout in the cover.  I attached some clear acetate inside the cover for a window. 

To decorate the box, I cut navy cardstock about 1/4" smaller than the sides and topped that with white labels sixteen, which I embossed with textile embossing folder and sponged with turquoise ink. 

On the sides of the cover, I added navy cardstock.  On the top four corners, I added small photo corners punched from navy cardstock. 

The box is 3"x3"x3" and the ornament fits just a bit loosely inside, so I'll add some tissue paper to make it look pretty and keep it from bouncing around. 

I've hung quite a few of these on my tree.   But I think it's more fun to see someone's face light up when you give them one.  I surprised the mail lady with one yesterday. 

I'm entering this box in the Scor-Pal blog challenge More than one Score #11 - Anything Goes.  Thanks so much for stopping by. 

Wednesday, September 24, 2014

sizzix challenge

Hi friends.  I decided to participate in this month's challenge on the Sizzix blog.  This is the inspiration for the challenge. 


Take The Sizzix Challenge!
I used the mason jar die to cut jars from white cardstock and clear acetate.  I also cut a partial from some shimmery gray cardstock for the jar cover. 


Using button, button from SU, I stamped a lot of buttons with tuxedo black memento ink and colored them with copic markers.  Some I didn't color.  All the round ones were punched out with various circle punches, but those that weren't round had to be cut out with scissors. 

Then I just started gluing them onto the jar back until the jar was filled with buttons. 

I attached the acetate to the back underneath the cover so the glue wouldn't show. 

Some faux stitching seemed appropriate with the buttons.  The jar is attached with dimensional foam tape. 

The sentiment is from rubbernecker, and is die cut with spellbinders labels seventeen. 

Thanks so much for stopping by. 

Saturday, September 6, 2014

fan club challenges part 16

Hi friends.  This is the final bunch of cards from the dare to get dirty challenges on SCS. 

Two simple layouts using some designer paper.  Both of these were used in my cuttlebug class. 


I changed this blue one just a bit for class, because I didn't have enough of the floral paper.  So in class, we stamped an image and used a blender pen to spread the ink.  I like both versions. 

I hope you enjoyed seeing all the cards I made for the special challenges.  Thanks so much for stopping by. 

Wednesday, September 3, 2014

fan club challenges part 13

Hi friends.  Another group of cards made for the dare to get dirty challenges on SCS. 

Another one of my old favorite stamps from SU, roses in winter. 

A masculine bird card. 

Seems like I'm always needing belated birthday cards. 

Thanks so much for stopping by. 


Sunday, August 31, 2014

fab club challenges part 10

Hi friends.  Another installment of dare to get dirty challenge cards. 

I pulled my color scheme from the Prima designer paper. 

The background was made by stamping each sentiment many times.  I used the same phrase from six different stamp sets. 

This spinning wheel stamp has been sadly neglected. 

Thanks so much for stopping by. 

Tuesday, August 26, 2014

fan club challenges part 5

Hi friends.  Here are some more of the cards I did for the dare to get dirty challenges on SCS. 

I used a little faux washi tape on this one. 

This idea for lego blocks isn't original, but makes a fun card.  My daughter's boyfriend, who collects legos, was the recipient of the card. 

Another shot shows some of the dimension.  I really does look better in person. 

Inspiration for this card was derived from things I was wearing - a watch and a blue t-shirt. 

Thanks so much for stopping by. 

Saturday, August 23, 2014

far club challenges part 2

Hi friends.  Here are some more of the cards I did for the SCS fan club challenges this month.   I've scheduled posts for the next two weeks to include all the cards. 

Some Gina K Designs flowers. 
The background on this one was made with several colors of acrylic paint and then the wood stamped over it.  
The glittery parts of this one are punched from some recyled boxes.  The glitter is mixed with clear embossing powder. 

Thanks so much for stopping by.